VPS Cloud
VPS Cloud is a pool of cores, RAM, disk and public IP addresses. You split the pool across as many servers as you like, and create and remove the servers yourself in the portal.
You choose the size of the pool when you order. The service itself gets the name you
gave it in the cart, for example lab.yourcompany.com. You name the servers when you
create them.
See what is left in the pool
Open the service under Services and choose Resources. Total is the size of the pool, Left is what you can use for new servers.
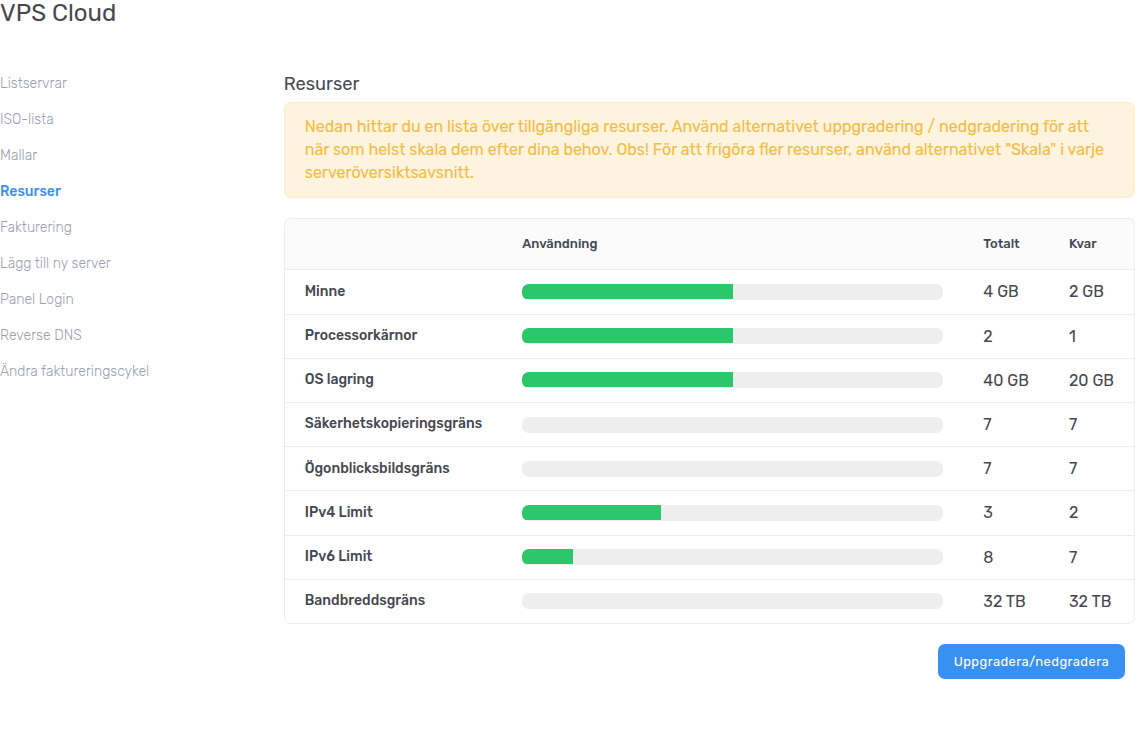
If you need a larger pool, choose Upgrade / Downgrade.
Create a server
- Choose Add new server.
- Fill in Hostname, for example
web1.yourcompany.com, and a Password. The password is only needed if you log in through Console. - Select your key under SSH Keys. The keys are not preselected, so do not skip this step. You add new keys under Manage SSH Keys.
- Choose an OS Template and move the sliders for cores, RAM and disk.
- Under Interface net0, choose the IPv4 pool:
- Public IP(s) for a server that should be reachable from the internet. It uses one address from the pool.
- Your private network, for example
10.240.3.0/24, for a server that should only be on the private network. It uses no public address. See Private network.
- Click Create new Virtual Machine.
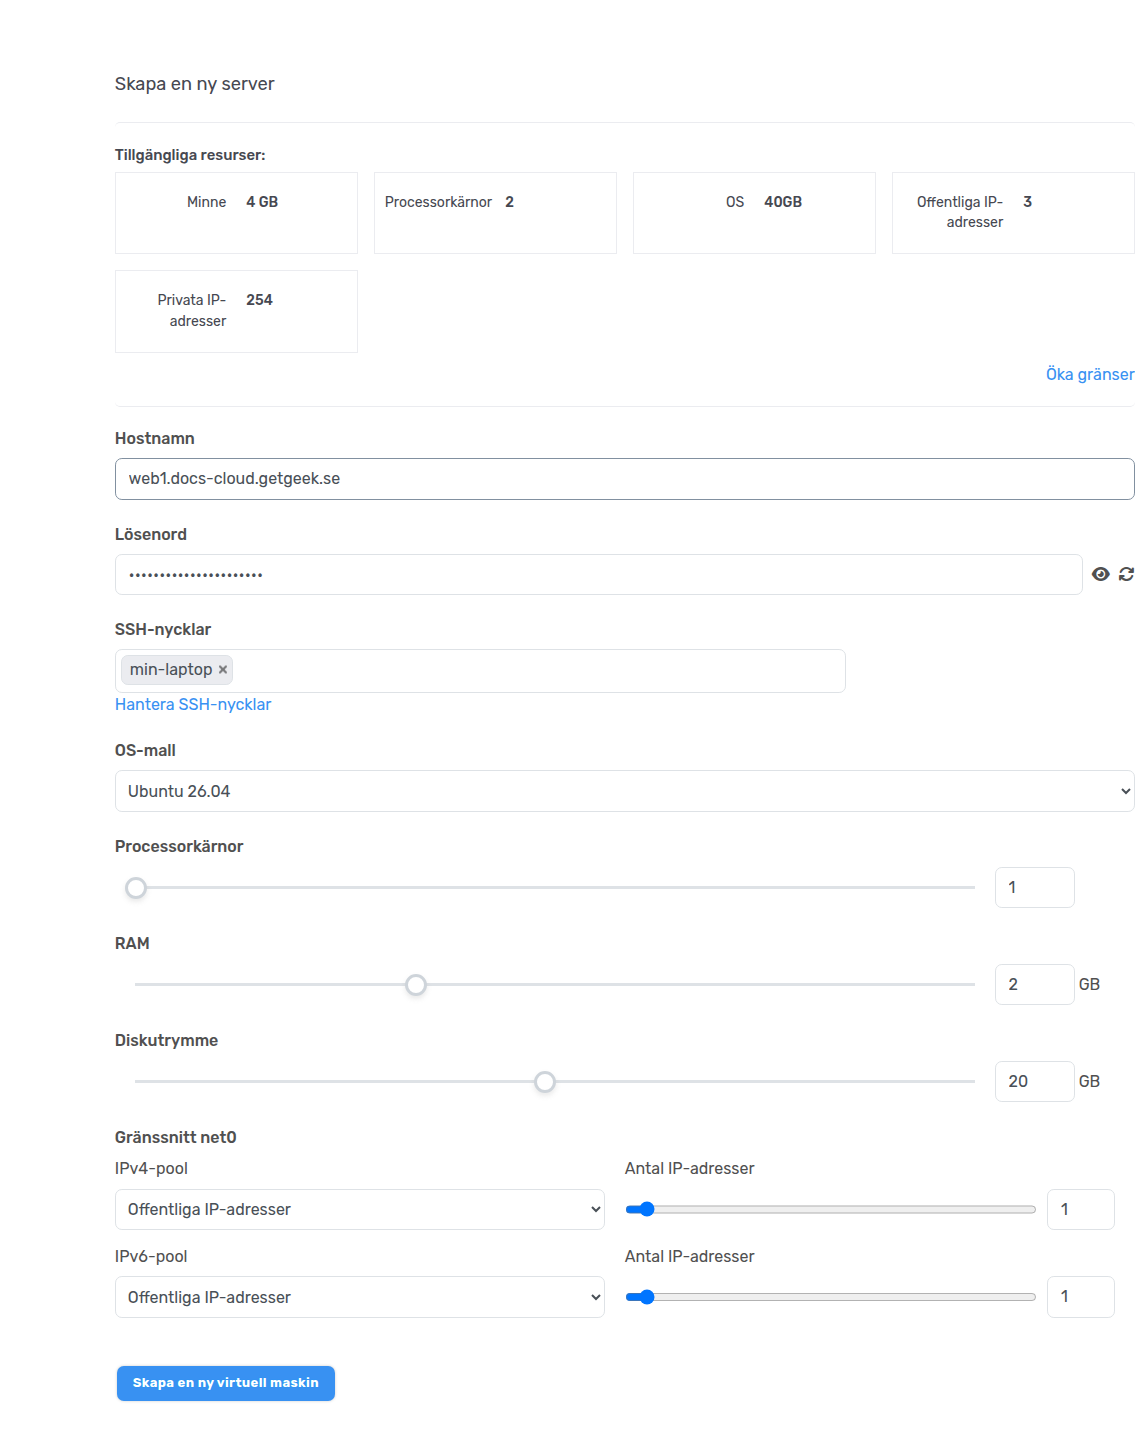
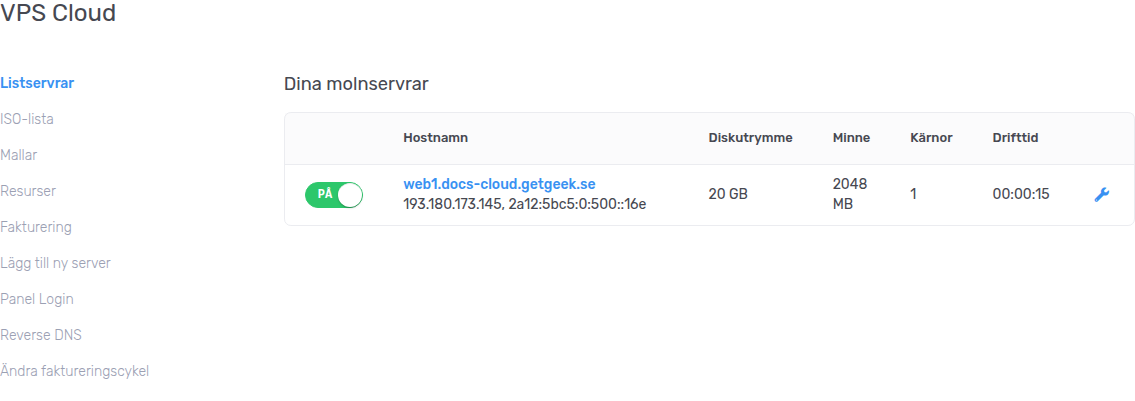
The server is shown as being created for a short while and then as ON under List Servers.
Log in
Click the server in the list. Each server has its own random Username, shown in the server overview together with its addresses. Then log in as usual, see Getting started.
Remove a server
Open the server and choose Delete. The server's cores, RAM, disk and addresses are returned to the pool right away.
The server and its disk are deleted and cannot be recovered.